Roof panel with 2 lights


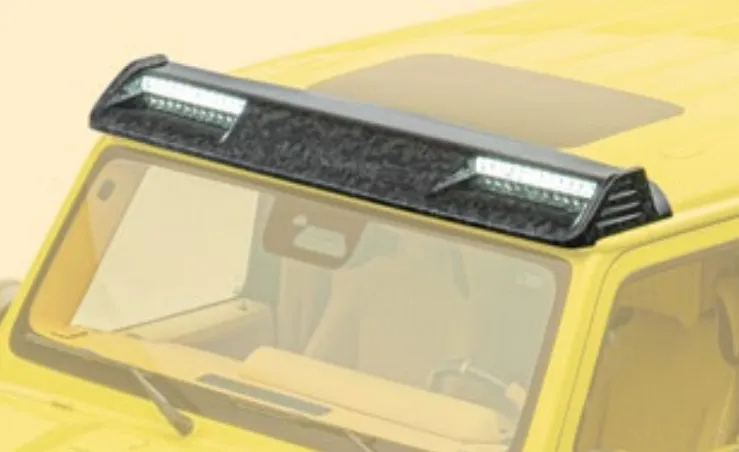
Mansory Roof Panel with 2 Lights — Entry-Tier Carbon Light Bar for the Mercedes-Benz G-Class W465 Gronos
Most G-Class roof-bar projects either say everything or say nothing. A six-lamp bank announces an off-road build the moment the truck rolls into view; a bare roof says you are running the OEM aesthetic. The Mansory Roof Panel with 2 Lights for the W465 Gronos sits deliberately in the middle — a sculpted carbon roof console with two integrated auxiliary lamp pods, enough to give the truck unmistakable roof-line presence and add real forward light at low road speeds and on unpaved tracks, but without the weight, the wiring complexity or the visual heaviness of the larger six-lamp variant. It is the panel for owners who want the Gronos signature on the roof without committing the truck to a full expedition look.
Why two lamps suits a daily-driven Gronos
A Gronos that mostly drives city, highway and the occasional gravel road does not need a thousand-watt rooftop floodlight. What it needs is a piece of architecture on the roof that reads as engineered, plus a pair of auxiliary lamps that earn their keep when they are switched on. Two lamps deliver:
- Sufficient peripheral fill for off-road night driving at the speeds you will actually drive — well under 60 km/h on rough surface — without lighting up the cabin via reflection off the roof line.
- Visible presence at front three-quarter views: the panel reads as a deliberate console rather than a parts-bin add-on, but the lamp count keeps the visual register restrained.
- Compatibility with most jurisdictions' aux-light limits when the lamps are correctly wired with high-beam interlock — see ECE R112 notes below.
- A wiring harness simple enough to install in a single working day, with one relay and one dash switch.
Owners who order the six-lamp variant typically do so because they actually use the truck off-road at speed, or because the maximalist roof-bank is the visual statement they want. The two-lamp panel is the right answer for everyone else.
Lamp specification and selection
Unlike the explicitly Hella-branded sibling (the roof panel with 2 position lights Hella), this panel is configured with non-Hella-specific lamp pods. The default fitment is a pair of mid-output LED auxiliary units in the 4500–5500 lumen range each, with the following typical configuration:
- Output: 4500–5500 lm per lamp at 5000–5500 K colour temperature, totalling 9000–11000 lm at the front of the truck.
- Beam pattern: two specifications available at order. Work-light pattern (wide flood, ~60° horizontal) for slow-speed off-road peripheral illumination; driving-light pattern (~12° spot, longer throw) for unpaved-road forward fill. The panel itself is identical — only the lamp insert changes.
- Power draw: typically 35–60 W per lamp depending on insert; 70–120 W combined.
- Sealing: IP68/IP69K-rated lamp housings on all default inserts; weatherproof connectors throughout.
- Mounting: the panel uses a standard 90 mm bezel pattern in the lamp pockets, accepting most premium aftermarket auxiliary lamps later if you wish to upgrade — Hella, Lazer Lamps, PIAA, Vision X, Rigid all bolt straight in.
If you have a brand preference, tell the order desk during specification. The panel itself is brand-agnostic; the choice of lamp insert is a separate line in the build sheet.
Weight, roll axis and the case for fewer lamps
One of the less-discussed reasons to choose the two-lamp variant over the six-lamp one is the dynamic effect of mass on the roof of a tall, narrow vehicle. A G-Class is already a high-CoG truck. Adding mass at the roof line raises the CoG and increases the roll moment in transient steering. The numbers are not catastrophic at either count, but they are not zero:
- Two-lamp panel mass: approximately 2–3 kg added to the roof, including lamps, harness and console.
- Six-lamp panel mass: approximately 6–8 kg added to the roof, including the heavier lamp bank, longer harness and reinforced console.
- Practical consequence: at city and highway speeds the difference is imperceptible. On twisty road work or sustained dirt-road driving with sharp directional changes, the lower roof mass of the two-lamp variant makes the truck feel slightly more settled in transitions.
This is not an argument that the six-lamp variant handles badly — it does not. It is an argument that if you are not going to use the extra four lamps, there is no reason to carry their mass on the roof of a truck that already weighs 2.5 tons.
Wiring architecture: simple by design
The two-lamp panel is engineered around a single-relay, single-switch wiring loom. That is a deliberate simplification compared with the six-lamp variant, which uses dual relays and a more complex switching architecture to share load across multiple high-current circuits.
- Power feed: a single 12V supply tapped from the engine-bay distribution box through an in-line fuse holder.
- Relay: one automotive relay, typically rated 30–40 A, sufficient headroom for both lamps at full draw.
- High-beam interlock (recommended): the relay coil tied to the OEM high-beam circuit, so the lamps activate only when high-beam is engaged. This is the configuration that satisfies ECE R112 for on-road use.
- Dash switch: a single OEM-look toggle in the lower fascia, with a kill function so the lamps can be disabled even when high-beam is engaged.
- Optional always-on bypass: for off-road use in jurisdictions that allow it, the relay can be wired to bypass the high-beam interlock; the order desk will configure based on your country.
Total wiring time on a fitter's bench: around four hours. Compare with the six-lamp variant, which typically runs six to eight hours of wiring time even for an experienced installer. If you are paying a workshop by the hour, the two-lamp panel returns measurable savings on the install bill.
ECE R112 compliance and on-road use
European auxiliary-light regulation hinges on ECE R112 (and the related R113), which sets the rules for additional driving lamps fitted alongside OEM headlights. The two-lamp configuration, when wired with high-beam interlock and using ECE-marked lamp inserts, sits comfortably inside those rules:
- Lamp count: two auxiliary high-beam lamps is well below the regulatory ceiling on most homologations; no special approval beyond the lamp's own ECE-R112 mark is required.
- Activation: high-beam interlock is the regulator-friendly wiring; lamps off when low-beam is engaged.
- Aim: proper beam aim at the bodyshop, with optical alignment if available, keeps the lamps within R112 tolerance.
- Covers: some jurisdictions require lamp covers for driving on public roads even with R112-marked lamps. Order desk supplies covers as a no-cost option.
The six-lamp variant is also achievable within R112 in many jurisdictions, but as the count grows the regulatory paperwork and the per-country edge cases grow with it. The two-lamp panel is the path of least friction for an owner who wants to drive the truck on public roads as well as off them.
Aerodynamics, wind noise and roof-line drag
Mounting two lamp pods on the roof of a tall vehicle adds frontal area and raises drag. The numbers, again, are modest but real:
- Drag coefficient impact: roughly 0.005–0.010 added Cd for the two-lamp panel, compared with 0.015–0.025 for the six-lamp panel — a meaningful proportional difference at highway speed.
- Wind noise: the panel's leading edge is sculpted to shed flow cleanly off the front roof line. At 110–130 km/h cruising speed cabin noise rise is barely measurable; over 150 km/h some additional whoosh becomes audible, particularly in cabins that are otherwise quiet.
- Lamp pod placement: the two pods sit slightly inboard of the panel's outer edges, in the lower-pressure zone where flow has already been deflected by the leading edge. That placement reduces direct lamp-on-airflow noise compared with edge-mounting.
For most drivers none of this is noticeable in daily use. It matters mostly to owners doing long highway stints at sustained high speed, where any rooftop addition affects fuel consumption and cabin noise predictably.
How this panel relates to its siblings in the W465 catalogue
The W465 Gronos catalogue includes several roof-mounted parts, each with a clearly different intent:
- The roof panel with 6 lights is the maximalist sibling — heavier, more complex, designed for serious off-road use or for owners committing to a full expedition aesthetic. Choose it if you actually use auxiliary light at speed, or if six lamps is the visual statement you want.
- The Gronos-branded roof panel with 2 lights shares the lamp count with this part but adds a CNC-engraved Gronos inscription across the panel face. Choose it if you want the brand identity reinforced at the highest visible point of the truck.
- The roof panel with 2 position lights Hella shares the lamp count again but commits to Hella as the optical brand, with R112-marked Hella inserts and the Hella logo visible at the lamp face. Choose it if you specifically want Hella optics.
- The roof wing is a different category entirely — a rear-roof aerodynamic element, not a front-roof light bar. The two parts coexist; many builds run both.
This part is the unbranded, brand-agnostic two-lamp option. It is the broadest specification in the family and the easiest to retrofit later if you want to swap inserts.
W465 fitment: roof bolt pattern is not W463A-compatible
The W465 G-Class introduced a revised roof-rail anchor geometry compared with the outgoing W463A. Spacing differs, anchor depths differ, and the front-roof transition curve is subtly reshaped. The Mansory roof panel for the W465 reflects those changes — the panel's underside mounting points are positioned for W465 anchor geometry. It is not interchangeable with the W463A roof panel of the same name. If your truck is a 2018–2023 W463A, order the W463A version of this part rather than this listing.
Verification at order time uses VIN; the order desk will confirm chassis generation before the build is released. This avoids the common error of ordering for the wrong generation and discovering the bolt pattern does not line up at install.
Construction and material specification
- Outer skin: 2x2 twill 200 g/m² visible carbon, autoclave-cured at 130 °C, finished with UV-stable clear coat. The carbon weave reads as architecture against the painted roof.
- Internal frame: aluminium structural frame providing rigidity at the lamp mounting points and resisting deflection at highway speed.
- Mass: 2.0–2.4 kg for the panel itself; 0.6–0.9 kg per lamp insert; total roof-line mass 3.2–4.2 kg as fitted.
- Mounting: structural-adhesive bond at the perimeter plus mechanical fasteners at four primary anchor points on the W465 roof. Stainless hardware with vibration-damping isolators throughout.
- Sealing: the panel-to-roof joint is gasketed with a closed-cell EPDM strip; no water ingress in normal operation including high-pressure car-wash cycles.
Installation summary
- Surface preparation: clean and degrease the front-roof contact zone; verify roof paint is undamaged.
- Pre-fit the panel dry; confirm clearance with the windshield, the sunroof aperture (where fitted), and any roof-mounted antenna.
- Apply structural adhesive at the perimeter; secure mechanical fasteners at the four primary anchor points to manufacturer torque.
- Route lamp wiring through the front roof-edge zone into the cabin via the windshield A-pillar grommet.
- Install relay and fuse at the engine-bay distribution box; tap relay coil into OEM high-beam circuit if running interlock.
- Install dash toggle switch in the lower fascia; verify illumination across all activation states.
- Cure structural adhesive 24 hours before exposure to high-pressure washing.
Total install time: approximately 4–6 hours for an experienced bodyshop and auto-electrician working together.
Ordering and lead-time
The panel is made to order in EUR pricing, with a lead-time of 10–14 weeks from order release. Worldwide freight is arranged from the Mansory works through Hodoor's freight desk; lamp inserts ship with the panel.
This part is part of the broader Mansory Body Kit for Mercedes-Benz G-Class W465 Gronos; full Mansory parts catalogue available at the Mansory collection.
FAQ
Q: Can I upgrade to six lamps later if I decide I want more illumination?
A: The two-lamp panel and the six-lamp panel are different mouldings — the panel itself differs in pocket count, console length and internal frame layout. Upgrading is therefore a panel swap rather than a lamp-pod-only swap. The harness from the two-lamp install can be reused for two of the six pods, but the additional pods need a heavier loom and a second relay.
Q: Are the supplied lamps Hella?
A: This listing is brand-agnostic. The default fitment is a quality LED auxiliary lamp pair sized for the panel; specific brand depends on availability at build time. If you specifically want Hella, order the Hella-branded sibling with R112-marked Hella inserts. If you specifically want another brand, name it on the build sheet.
Q: Will the panel fit a W465 with a panoramic sunroof?
A: Yes. The panel sits at the front roof edge, ahead of the panoramic aperture. Sunroof operation is preserved. Confirm with VIN at order time so the order desk can flag any trim-specific clearance considerations.
Q: How does the two-lamp panel affect resale value compared with leaving the roof bare?
A: Mansory body parts on a Gronos build are typically a value-neutral or value-positive proposition for a buyer also looking for a Mansory truck. The two-lamp panel specifically is the most broadly accepted variant — heavier, more committed roof racks can narrow the buyer pool. The brand-agnostic two-lamp panel sits well with most second-owner profiles.
Q: Is the panel removable if I later want to return the truck to a clean roof line?
A: Yes, with bodyshop time. The structural adhesive needs to be cut and the bonded zone cleaned and refinished; the mechanical fasteners back out cleanly. Plan a working day at a bodyshop for a tidy removal and refinish.
Order this roof panel
WhatsApp +44 7488 818 747 — fitment confirmation by VIN, lamp specification, build-sheet release.
[email protected] — written quotation, lead-time scheduling, freight arrangement.
Lead time 10–14 weeks; price quoted in EUR; made to order; ships worldwide.